Patent Pending Technology
Non PenetratingRoof Tarp Anchoring System
A faster, safer alternative to sandbags and nails. Works with all roof surface types.
Built for insurance carriers, inspectors, and contractors
The Problem with Traditional Tarping Methods
Current tarping solutions create operational challenges in the field
Nailing Method
- Causes roof damage and additional claims
- Cannot be used on tile, metal, or specialty roofs
- Creates liability for contractors and carriers
Sandbags
- Heavy and difficult to transport to roofs
- Labor intensive to deploy
- Slows response time during large loss events
Availability
- Materials often unavailable during major storms
- Supply shortages delay response
- Inconsistent solutions across crews
TarpBags vs Sandbags vs Nails
| TarpBags | Sandbags | Nails | |
|---|---|---|---|
| Requires roof penetration | No | No | Yes |
| Speed | Fast | Slow | Fast |
| Labor required | Medium | High | Medium |
| Works with all roof types | Yes | Yes | No |
Requires roof penetration
TarpBags
No
Sandbags
No
Nails
Yes
Speed
TarpBags
Fast
Sandbags
Slow
Nails
Fast
Labor required
TarpBags
Medium
Sandbags
High
Nails
Medium
Works with all roof types
TarpBags
Yes
Sandbags
Yes
Nails
No
A Smarter Way to Secure Tarps
Uses onsite water. No sand transport needed
Non destructive anchoring without roof penetration
Controlled weight distribution for roofing applications
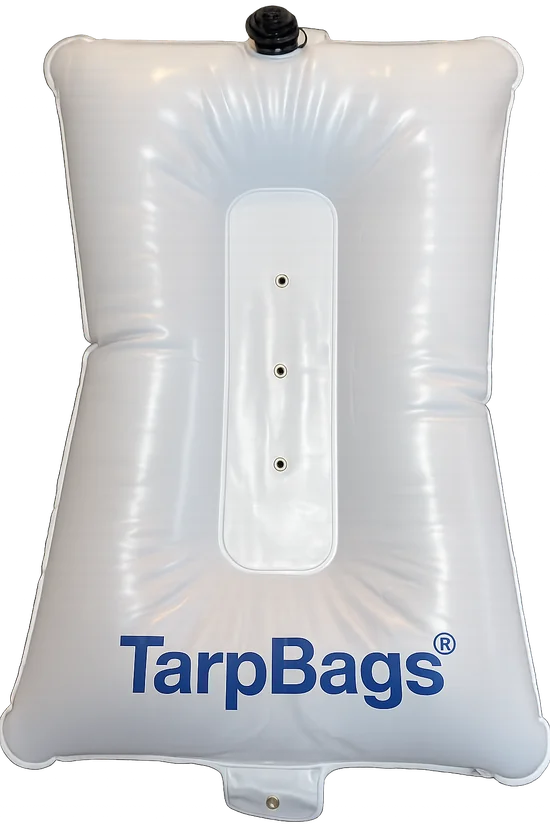
Carried empty and filled at roof. Reduces lifting strain
Reusable, durable, and eco friendly
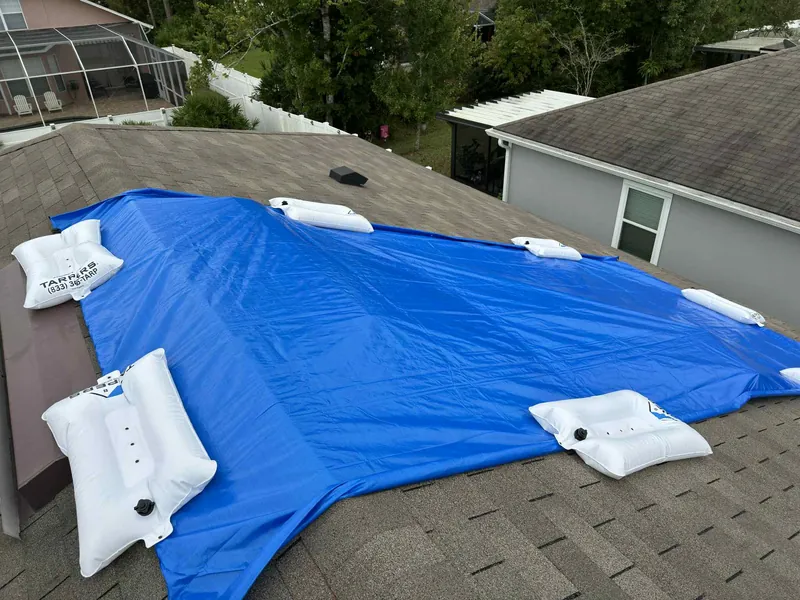
How It Works
Four steps to secure a tarp on any roof without penetration.
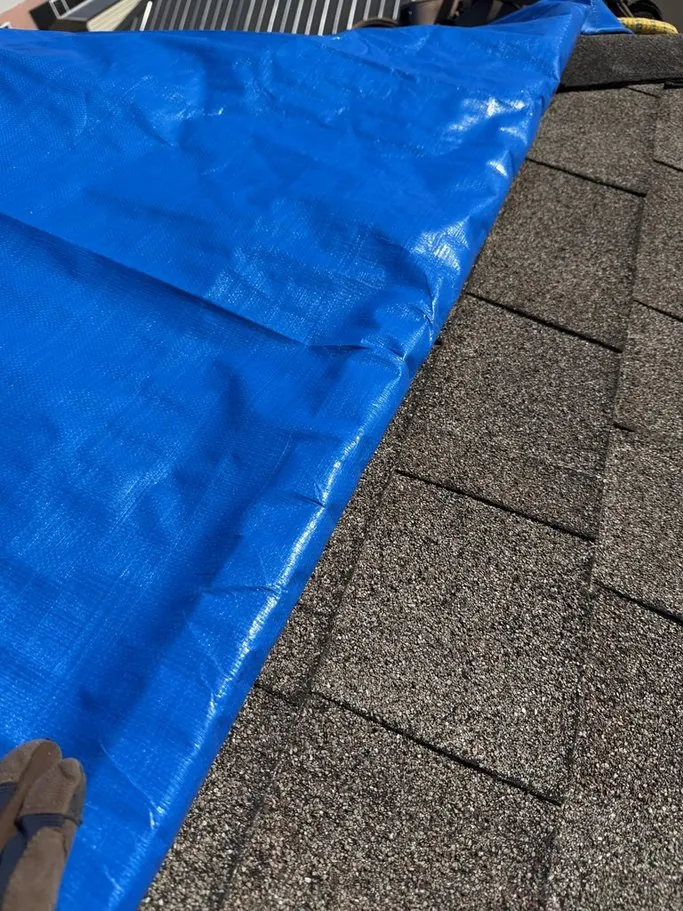
Position Your Tarp and Roll Furring Strips
Lay a heavy duty polyethylene tarp over the damaged area. Place furring strips along the perimeter and roll the tarp edge tightly around the strips to create a secure anchor edge.
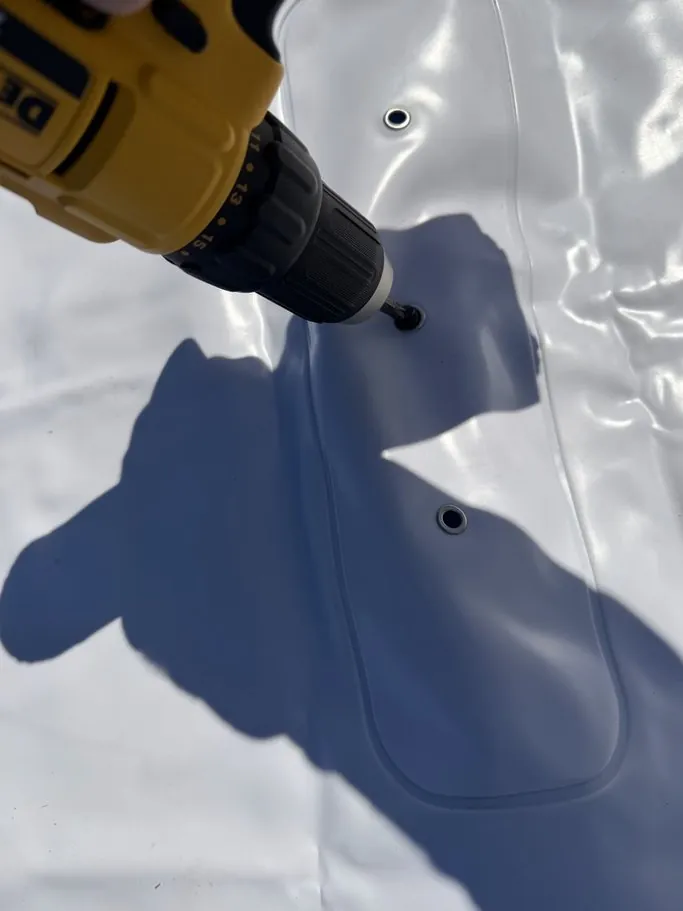
Secure TarpBags to the Furring Strips
Position empty TarpBags along the rolled edges and fasten them to the furring strips using screws. Fasteners go into the wood strips only, not the roof.
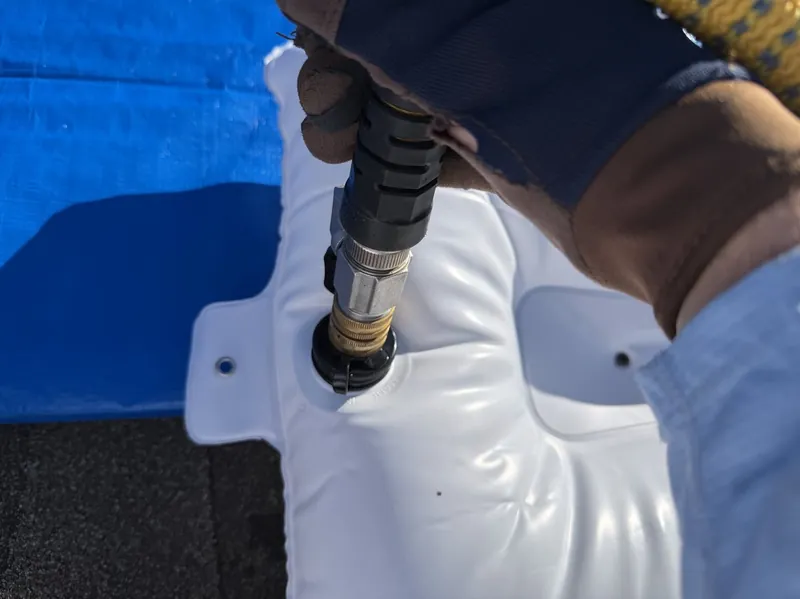
Fill with Water
Connect a standard garden hose and fill each TarpBag on site. Each bag fills in a few minutes and provides controlled weight distribution.

Secure the Perimeter
Continue placing filled TarpBags along the perimeter to fully secure the tarp without roof penetration.
Why Use Furring Strips
- Holds tarp securely in high wind conditions
- Reduces stress on tarp edges and prevents tearing
- Keeps tarp tight and reduces movement
- Allows fastening without penetrating the roof
Designed for Real World Deployment
Built to support large scale tarping operations across insurance, inspection, and contractor teams
Insurance Carriers
Supports consistent tarping methods across large loss events and reduces additional roof damage risk
Inspection Firms
Provides a safer and faster solution for securing tarps during field inspections
Roofing Contractors
Eliminates the need for roof penetration while improving install speed and efficiency
Mitigation Companies
Reduces labor and material challenges during emergency response situations
What Industry Leaders Are Saying
A non penetrating system like TarpBags is the kind of innovation that could reshape post storm response.
Donald Crouch
Chief Executive Officer, Otter Claim Solutions